Wet Room Installation: The Complete UK Technical Guide
Step-by-step wet room installation guide for the UK. Floor formers, tanking to BS 5385, drainage gradients, tiling, building regulations and costs.
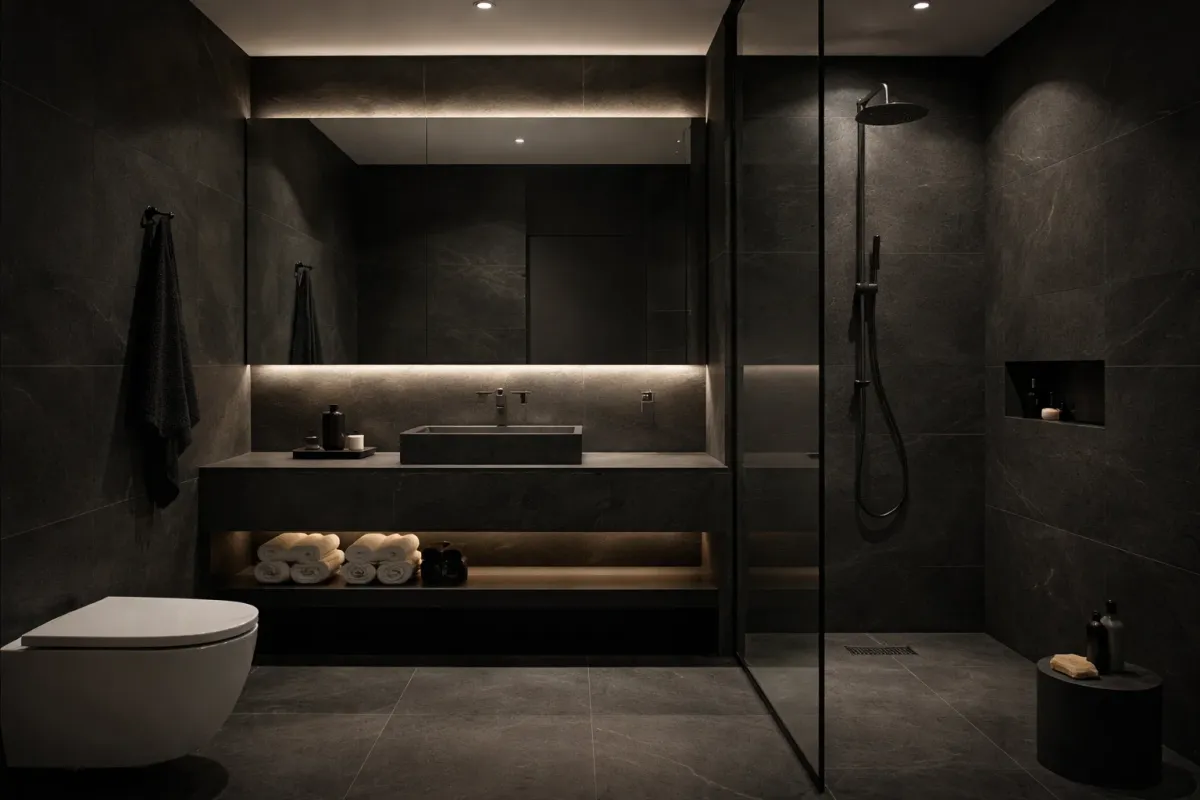
What Makes a Wet Room Installation Different from a Standard Bathroom

A wet room is not a bathroom without a shower tray. It is a fully waterproofed enclosure where the entire floor functions as the shower base, sloping toward a drain set flush with the finished tile surface. Every surface that might receive water, directly or through splash, must be tanked to form a continuous waterproof envelope. The floor must be precisely graded to prevent pooling. The drainage system must handle the full flow rate of the shower without backing up. And the electrical installation follows different zoning rules to a standard bathroom because there is no shower tray to define the boundary of the wet area.
These technical requirements are what separates a wet room that works for decades from one that develops hidden leaks within months. The installation sequence matters. The product specifications matter. The substrate preparation matters. Getting any single element wrong, whether it is incomplete tanking coverage, incorrect floor gradient, or the wrong adhesive classification, can result in damage that only becomes apparent when water has already reached the structure below.
This guide covers the full installation process from substrate to finished tile, the UK building regulations that apply, the products that meet the required standards, and what every stage costs. For the design and planning side of wet rooms, including accessibility standards, property value impact, and layout options, see our wet room design and planning guide. For a direct comparison with conventional shower rooms, see our wet rooms vs shower rooms guide.
Floor Construction: Gradients, Formers and Drainage
The floor is the most critical element of any wet room installation. BS 5385-4:2015 specifies that falls within the shower area should be between 1:80 and 1:35, meaning a minimum drop of 12 to 15mm over the distance from the perimeter to the drain. The gradient must be formed into the floor structure itself. It cannot be created with varying tile thickness or adhesive bed depth, because uneven adhesive beds create voids that trap water and compromise the waterproof envelope.
Pre-Formed Floor Formers
The simplest and most reliable method for creating the correct gradient is a pre-formed floor former. These rigid panels have the drainage gradient already built in and sit directly on the subfloor structure.
Impey Aqua-Dec EasyFit is the UK market leader. A 22mm thick GRP panel with four pre-formed drainage gradients, it accommodates both timber and concrete subfloors. The central drain plate rotates 360 degrees to avoid underfloor obstructions and can be trimmed to fit. Flow rate capacity reaches 36 litres per minute through a 50mm water seal with a 43mm solvent weld connection. Available sizes range from 900x900mm to 1700x750mm. UK retail price runs £200 to £550 depending on size.
Impey Aqua-Dec Linear models slope on one or two planes toward a linear drain at floor level. The Linear 2 delivers 40 litres per minute through a 600mm channel, the Linear 3 handles 35 to 42 litres per minute through an 800mm channel, and the Linear 4 reaches 42 litres per minute. These require a minimum 95mm clearance below the former for the drainage assembly.
Maxxus Wet Room Floor Former offers a 22mm self-supporting panel with a load capacity of 470kg over 400mm joist centres and a totally flat underside for straightforward installation. Compatible with Purus drainage systems and Hydromat membrane tanking kits.
Point Drain vs Linear Drain
The choice between a point drain and a linear drain affects tile selection, floor gradient complexity and the visual result.
A point drain (central waste) requires the floor to slope from all four directions toward a single point. This compound gradient limits tile choice to mosaics or small-format tiles (under 300x300mm) because large tiles cannot follow a four-way fall without lipping at the edges. Point drains suit smaller wet rooms and budget installations.
A linear drain (channel) allows the floor to slope on a single plane toward a trough set along one wall or across the floor. This single-direction fall accommodates large-format tiles, delivering a cleaner visual result. Linear drains also handle higher flow rates. Schluter KERDI-LINE delivers 42 to 48 litres per minute in lengths from 500mm to 1800mm. ACO ShowerDrain channels in stainless steel handle 72 litres per minute with a construction height of just 65mm in the lowered profile.
For context, a standard mixer shower delivers 8 to 12 litres per minute. A power shower can push 15 litres per minute or more. The drain must comfortably exceed the shower’s maximum output. BS 5385 notes that any shower with a flow rate of 12 litres per minute or greater requires a full tanking system.
Screed Falls (When Not Using a Former)
Where a floor former is not used, the gradient must be formed in a sand and cement screed at a ratio of 1:4 (one part Portland cement to four parts sharp sand). Minimum depth is 50mm on a concrete base. Self-levelling compounds are not suitable because they cannot hold a gradient. Adding polypropylene fibres improves crack resistance. Drying time follows the rule of one day per millimetre for the first 40mm, then two days per millimetre beyond that. A 50mm screed needs approximately 60 days to dry fully, though it can be walked on after five to seven days.
Tanking: The Waterproof Envelope
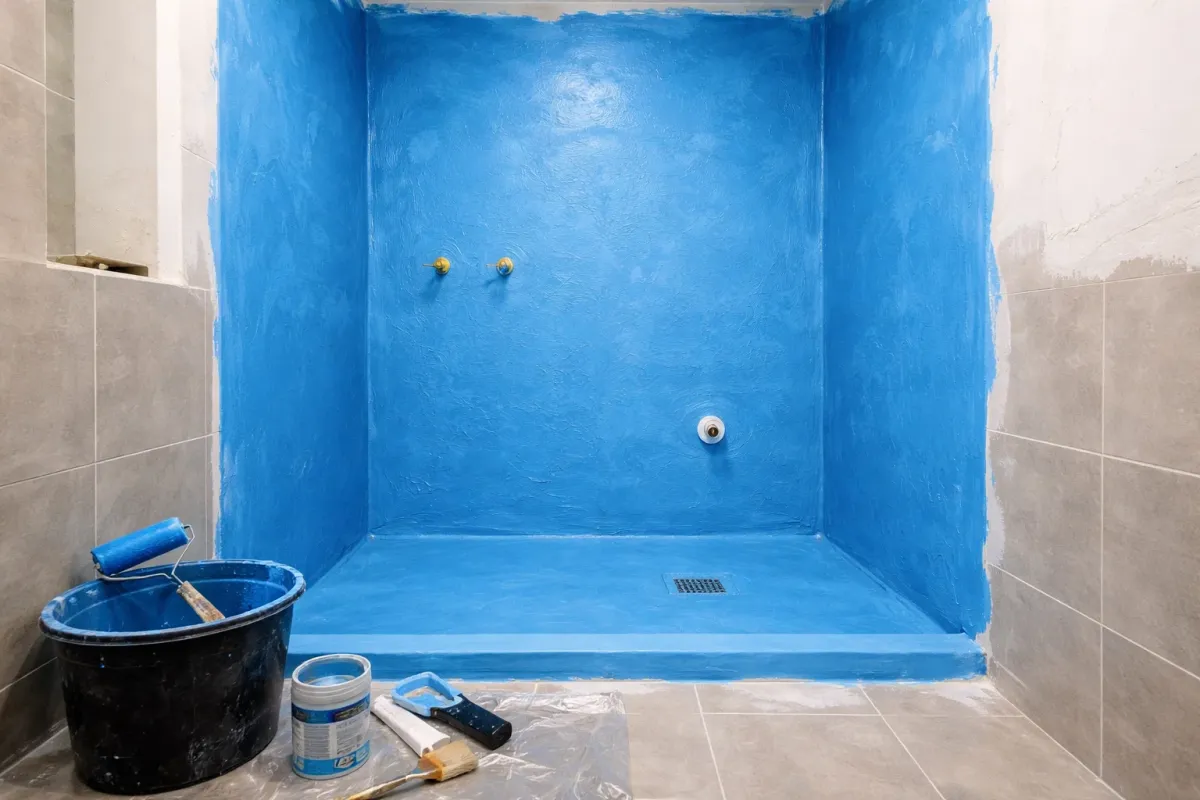
BS 5385-4:2015 categorises wet rooms under “frequent wetting,” which triggers mandatory full tanking. The standard sets six requirements: the structure behind tiles must be watertight; water-resistant substrates must be used throughout (standard plasterboard and plaster are unsuitable); tiles must be solidly bedded with 100 per cent coverage to eliminate voids; cementitious grout is acceptable when tanking is present; special attention must be paid to wall-floor junctions on suspended floors; and movement joints must use water-resistant sealants.
Liquid Tanking Systems
BAL Waterproof 1C is a single-coat system. Coverage runs 6 square metres on walls (0.8mm thickness) and 3 square metres on floors (1.6mm thickness) per 5-litre tub. It is ready to tile after just 2 hours, making it one of the fastest liquid systems available. NHBC-compliant and EAD-certified. Approximately £95 to £113 per 5-litre tub.
Mapei Mapelastic AquaDefense requires two coats applied one hour apart. Ready to tile 4 hours after application. Coverage is roughly 1kg per square metre for two coats. Available in 7.5kg and 15kg tubs at approximately £116 for the 7.5kg tanking kit. Ready to use with no mixing required.
Sheet Membrane Systems
Schluter KERDI-200 is a pliable polyethylene membrane bonded directly to the substrate with thin-set adhesive, with tiles applied directly over the membrane. Available in 2-metre wide rolls at approximately £8 to £9 per square metre. The uniform 8-mil thickness guarantees consistent performance. No curing time is needed between membrane application and tiling.
Impey WaterGuard is a self-adhesive butyl rubber membrane that can be tiled immediately after laying. Supplied as complete kits with membrane, jointing tape, corner pieces, primer and sealant. A 5 square metre floor kit costs approximately £400. Carries a lifetime warranty from Impey.
How Far Up the Wall
In the wet zone (the area directly within the shower, typically 1.2 metres from the shower outlet or drain), tanking must extend full height from floor to ceiling. Beyond the wet zone, waterproofing should extend a minimum of 1,000mm up the wall, though full-height tanking of all walls provides considerably more security for a modest additional cost. Where a shower screen is installed, waterproofing should continue at least 100mm beyond the screen edge.
Junctions and Penetrations
The floor-to-wall junction is the single most common failure point. BS 5385-4 specifically highlights the need for careful sealing here, particularly on suspended timber floors. Proprietary tanking tape must be embedded into the membrane at all internal corners and junctions. Pre-formed corner seals (internal and external) ensure continuity of the waterproof layer. Every pipe penetration requires proprietary pipe collars sealed into the membrane. Silicone alone is not sufficient for penetration sealing in wet rooms.
Timber Floors vs Concrete: Substrate Preparation
Timber Upper Floors
Most UK wet room conversions involve timber upper floors, which present specific challenges. Timber has inherent deflection and movement under load, plus seasonal expansion and contraction. This movement cracks tiles, dislodges grout and compromises waterproofing membranes if not properly managed.
Preparation requires removing existing floorboards completely in the wet room area and installing a minimum 18mm structural plywood (22mm preferred, 25mm for wider joist spacings) screwed to joists and noggins at 300mm centres. Use marine-grade or WBP (weather and boil proof) plywood. Additional noggins between joists support plywood edges and reduce deflection. Standard joist spacing of 400mm centres is optimal for wet room installations.
A structural engineer assessment is recommended for upper-floor wet rooms. Large-format porcelain tiles weigh 20 to 25 kg per square metre. Add the adhesive bed, screed and standing water, and total floor loading can reach 80 to 100 kg per square metre. Joists that have been cut or notched for previous plumbing runs may have reduced structural capacity.
A decoupling membrane such as Schluter DITRA (approximately £8 to £9 per square metre) absorbs substrate movement and prevents it transferring to the tile layer. This is essential on timber floors and recommended on concrete for additional security.
Concrete Ground Floors
Concrete provides a rigid, movement-free base that simplifies wet room installation considerably. Drainage can be installed before screeding in new builds, making gradient formation straightforward. In retrofit situations, the existing screed may need breaking out to accommodate new drainage and falls.
Tiling a Wet Room
Anti-Slip Requirements
Wet room floor tiles must provide adequate slip resistance for bare wet feet. The Pendulum Test Value (PTV) measured to BS 7976-2 is the UK standard. A minimum PTV of 36 is required for adequate wet barefoot safety. The German R-rating system classifies R10 as the minimum for wet barefoot areas, with R11 preferred for wet rooms. Higher slip resistance generally means smaller tile formats or textured surfaces.
Tile Size and Gradient
On a four-way fall to a point drain, small-format tiles or mosaics (25x25mm to 50x50mm on mesh sheets) are essential. Tiles larger than 300x300mm cannot follow a compound gradient without significant lipping between adjacent tiles. On a single-fall floor with a linear drain, large-format tiles work well because the floor slopes in only one direction.
Mosaics conform easily to any gradient but create extensive grout lines that demand more maintenance. If using mosaics on the shower floor, epoxy grout in a darker colour minimises discolouration. An alternative approach uses mosaics only in the immediate drain area, transitioning to larger tiles beyond the wet zone.
Adhesive Specification
BS 5385-4 and manufacturer guidance require a minimum C2 S1 classification per EN 12004 for wet room tiling. C2 denotes improved cementitious adhesive with higher bond strength. S1 denotes deformable (flexible), accommodating substrate movement. On timber floors with a decoupling membrane, S1 is the minimum; S2 (highly deformable) may be specified for demanding installations.
Full bed coverage (100 per cent) is mandatory. Dot-and-dab application is not permitted in wet rooms because every void behind a tile becomes a potential water trap. Recommended products include Mapei Keraquick S1 Zero (rapid-set), BAL Rapid-Flex One (C2FTE S1), and Mapei Super Flexible S1.
Cement Grout vs Epoxy Grout
Cement grout is easier to apply, more forgiving and significantly cheaper. It is porous, absorbs water and stains over time, requires annual sealing, and is susceptible to mould. It is acceptable in wet rooms with proper tanking but demands ongoing maintenance.
Epoxy grout is completely waterproof and stain-resistant. It never requires sealing, maintains its colour indefinitely, and resists chemicals and heavy traffic. It costs roughly three to five times more than cement grout and demands precise, rapid application before it sets. For wet rooms, epoxy grout is the professional recommendation. The higher upfront cost eliminates the ongoing maintenance cycle entirely. For more on tiling materials and techniques, see our bathroom tiling installation guide.
Building Regulations for Wet Rooms
| Regulation | Requirement | Key Detail |
|---|---|---|
| Part C | Moisture resistance | Tanking system must prevent moisture reaching the building structure |
| Part P (BS 7671) | Electrical safety | Entire wet room is Zone 1 (no Zone 2). SELV max 12V in Zone 0. 30mA RCD protection required. No mains sockets or switches inside |
| Part F | Ventilation | Minimum 15 l/s intermittent extract; 8 l/s continuous. 15-minute overrun timer after light off |
| Part G | Water efficiency | Maximum 125 l/person/day (110 in water-stressed areas) |
| Part H | Drainage | Waste pipe independently to soil pipe. Correct pipe sizes, gradients and water seal traps |
| Part B | Fire safety | Applies when converting a non-bathroom space. May require FD30 fire doors on escape routes |
The electrical zoning is the most significant regulatory difference between a wet room and a standard bathroom. In a standard bathroom, the shower tray defines Zone 0 and Zone 1, with Zone 2 extending beyond. In a wet room with no tray, the entire room is typically classified as Zone 1 up to 2.25 metres from the floor. Zone 0 extends 100mm up from floor level in a 1.2-metre radius around the drain. There is no Zone 2. This means no mains voltage sockets, shaver points or switches can be installed inside the wet room. All switching must be outside the room or via pull cords. All electrical work must be carried out by a Part P registered electrician or notified to Building Control.
Converting an existing bathroom into a wet room generally does not require Building Regulations approval unless structural changes or new drainage are involved. Converting a non-bathroom space (bedroom, cupboard) into a wet room always requires approval.
What a Wet Room Installation Costs in the UK
Materials
| Component | Cost Range |
|---|---|
| Floor former (Impey Aqua-Dec or equivalent) | £200 to £550 |
| Tanking kit (liquid or sheet membrane) | £130 to £400 |
| Shower valve and head | £400 to £500 |
| Walk-in shower screen | £280 to £320 |
| Floor and wall tiles | £700 to £850 |
| Tile adhesive (C2 S1) | £60 to £80 |
| Grout (cement or epoxy) | £35 to £50 |
| Total materials | £1,800 to £2,800 |
Labour
| Item | Cost |
|---|---|
| Wet room installation labour (5-7 days) | £1,700 to £2,000 |
| Underfloor heating (optional) | £300 to £400 |
| Extractor fan installation | ~£300 |
| LED downlights | £300 to £500 |
Total Installed Cost
A standard wet room conversion costs £4,000 to £7,000, with £5,500 being the most common figure. High-end installations with large-format porcelain, underfloor heating and bespoke linear drainage reach £10,000 to £12,000. This represents roughly a 20 to 30 per cent premium over a standard shower room installation, reflecting the additional tanking, drainage and full floor-to-ceiling tiling.
The installation typically takes 5 to 7 working days for a conversion from an existing bathroom, or 7 to 10 days including strip-out. Smaller wet rooms can be completed in 3 to 5 days. For a detailed breakdown of bathroom renovation timelines by project type, see our bathroom renovation timeline guide.
For a free quote on your wet room installation, our wet room fitting team can assess your space, check the subfloor, and provide a fixed-price specification.
Seven Installation Mistakes That Cause Wet Room Failures
Incomplete tanking coverage. Tanking only the immediate shower area and not the full floor, wall junctions, and penetrations. Water finds its way into untanked zones through grout lines and hairline cracks. The tanking envelope must be continuous with no gaps.
Applying tanking over standard plasterboard or plaster. Both absorb moisture and fail. Only approved tile backer boards (cement board such as HardieBacker, or waterproof foam panels such as Wedi or Marmox) should be used in wet zones.
Incorrect floor gradient. A gradient that is too shallow causes pooling. A gradient that is too steep becomes a slip hazard. The fall must be between 1:80 and 1:35 and must be formed in the substrate, not compensated with tile thickness.
Using the wrong adhesive. Standard C1 adhesive or dot-and-dab application fails in wet rooms. The minimum specification is C2 S1 with 100 per cent bed coverage. Every void behind a tile is a potential water trap and a point of failure.
Choosing polished tiles for the floor. Polished porcelain becomes dangerously slippery when wet. Floor tiles must have a minimum PTV of 36 (wet pendulum test). Specify anti-slip or textured finishes for any surface that will receive water.
Neglecting the floor-to-wall junction. This is the most common failure point. Without proprietary tanking tape and corner seals embedded into the membrane at every internal corner and junction, water bypasses the tanking system at the weakest point.
Rushing the tanking application. Liquid tanking systems require specific thickness and coverage rates. Uneven application leaves vulnerable spots. Most systems need 2 to 24 hours before tiling depending on the product. Cutting this short to save a day on the programme guarantees a callback.
When tanking fails, the consequences extend well beyond the wet room itself. Water penetrates through to the substrate, timber rots, damp develops in adjacent rooms and the ceiling below, tiles loosen as adhesive bonds fail, and mould grows behind tiles where it remains invisible until the entire installation is stripped out. Repair typically costs more than the original installation. UK home insurance may deny claims resulting from poor workmanship or gradual damage from slow leaks, making professional installation with documented guarantees the only sensible approach.
Frequently Asked Questions
How much does a wet room cost to install in the UK?
Can you install a wet room on a timber floor?
What is the difference between a point drain and a linear drain?
Do I need Building Regulations approval for a wet room?
How long does wet room tanking take to dry before tiling?
What tiles are suitable for wet room floors?
Should I use epoxy or cement grout in a wet room?
Past Projects


Get a Free Quote
Book a free, no-obligation site survey. Call us on +44 7428 653 653 or request a callback.
Book Free SurveyOur Clients' Reviews

5/5

5/5

5/5

5/5
Based on 453+ verified reviews across all platforms
Related Articles
Wet Rooms vs Shower Rooms: Which Is Right for Your Bathroom?
Two Options, Very Different Installation Requirements The difference between a wet room and a shower room is more than aesthetic. It affects the waterproofing strategy, the drainage system, the floor construction, the electrical zoning requirements and, ultimately, the cost.
view this article Read more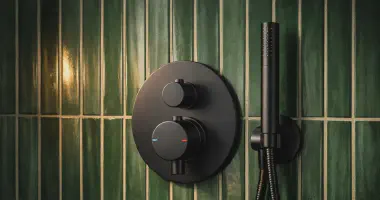
The Beauty and Practicality of Wet Rooms: A Design and Planning Guide
Why Wet Rooms Have Become the Most Requested Bathroom Upgrade The wet room has moved from niche luxury to mainstream demand faster than almost any other bathroom feature in the UK market.
view this article Read more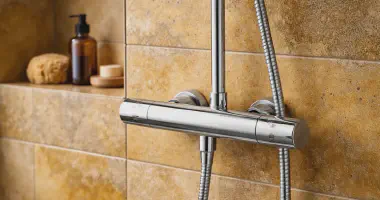
How Much Does a New Bathroom Cost in 2026? UK Pricing Guide
What a New Bathroom Really Costs in 2026 The question every homeowner asks before a bathroom renovation is the same. How much?
view this article Read more
Bathroom Renovation Guide: Every Stage From Start to Finish
What a Bathroom Renovation Actually Involves A complete bathroom renovation is one of the most rewarding home improvement projects you can undertake, but it is also one of the most misunderstood.
view this article Read more
Bathroom Tiling Styles for Timeless Elegance
Why Layout Matters More Than the Tile Itself A bathroom tile is a raw ingredient. The layout pattern is the recipe.
view this article Read more
Quartz, Granite or Porcelain Worktops: Which Suits Your Kitchen?
The Three-Way Decision Most Kitchen Renovations Come Down To Once you have decided that laminate is not enough and solid wood is not right for your cooking habits, the conversation narrows quickly.
view this article Read more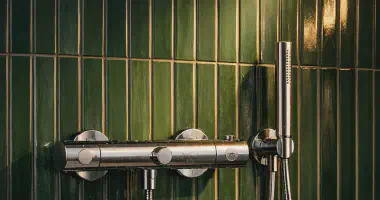
Ceramic Disc Technology in Bathroom Taps: How It Works
The Technology Inside Almost Every Modern Tap If your bathroom taps turn with a smooth quarter-turn rather than two and a half rotations, they contain ceramic disc cartridges.
view this article Read more
Fitting Kitchen Worktops: The Complete Installation Guide
From Order to Fitted The worktop is one of the last things fitted in a kitchen renovation and one of the first things to go wrong if the process is rushed.
view this article Read more
How to Choose an Electrical Bathroom Mirror
What an Electrical Bathroom Mirror Actually Does An electrical bathroom mirror is a permanently wired fixture that combines a mirror with integrated LED lighting, and often a demister pad, Bluetooth speakers, a shaver socket, or adjustable colour temperature.
view this article Read more
Best Bathroom and Toilet Brands in the UK
What Makes a Good Bathroom Brand The brand name on your toilet, basin or shower valve determines far more than the price tag.
view this article Read more
Bathroom Underfloor Heating: Types, Installation and What to Expect
Why Underfloor Heating Works So Well in Bathrooms Stepping onto a warm bathroom floor on a cold January morning is one of those small luxuries that, once experienced, becomes very difficult to give up.
view this article Read more
Tools Required for Bathroom Fitting: The Professional Trade Toolkit
The Professional Bathroom Fitter’s Complete Toolkit Every professional bathroom fitter knows that quality tools are an investment, not an expense. The difference between a flawless installation and a problematic one often comes down to having the right equipment for the job.
view this article Read more