Bathroom Renovation Guide: Every Stage From Start to Finish
Step-by-step bathroom renovation guide: demolition, plumbing, tiling and finishing touches. Expert advice from professional bathroom fitters in Manchester.
What a Bathroom Renovation Actually Involves

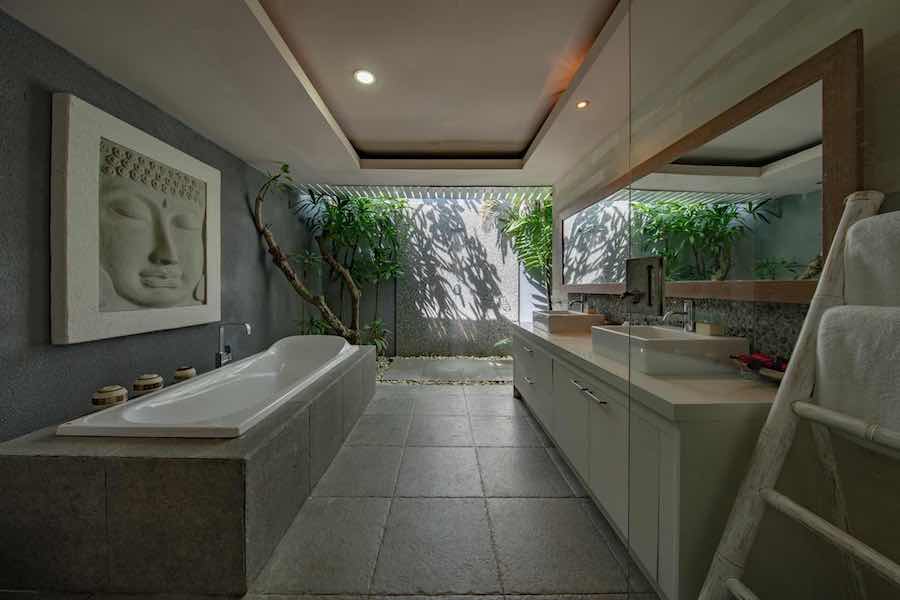
A complete bathroom renovation is one of the most rewarding home improvement projects you can undertake, but it is also one of the most misunderstood. Homeowners frequently picture the finished result without appreciating the sequence of skilled trades and carefully timed stages that make it happen. Every professional bathroom renovation follows a logical order, and understanding that order is the single most important thing you can do before your project begins.
A standard bathroom renovation in the UK typically takes between five and ten working days, depending on the size of the room and the complexity of the work involved. A straightforward like-for-like replacement of sanitaryware in a small bathroom sits at the shorter end. A full strip-out with relocated plumbing, new electrics, underfloor heating and floor-to-ceiling tiling will push closer to the ten-day mark or beyond. For a deeper look at what affects these timelines, our article on how long a bathroom renovation takes breaks it down further.
This guide walks through every stage in the order that professional bathroom fitters actually complete them on site. Whether you are managing the project yourself or simply want to know what to expect when the work begins, this is your roadmap from first fix to final inspection.
Stage 1: Planning and Design
Good planning prevents expensive surprises. Before any tools come out, the entire project needs to be mapped in detail.
Start with accurate measurements. Record the room dimensions, ceiling height, window positions and the location of existing soil pipes, water supply lines and electrical points. These measurements dictate what is possible. A wall-hung toilet, for example, requires a supporting frame that needs at least 120mm of depth behind the finished wall surface, which may rule it out in a particularly narrow room.
Layout decisions come next. Think about where the door opens and how you move through the space. The position of the toilet relative to the soil stack has a significant impact on cost because moving a soil pipe is far more involved than repositioning a basin. Where drainage runs are concerned, gravity is non-negotiable. Water flows downhill, and the further you move a fixture from the existing waste, the more fall you need in the pipework, which can affect floor levels.
Material selection should happen during planning, not halfway through the build. Tiles, sanitaryware, taps, shower valves, towel radiators, lighting and accessories all need to be on site before the fitting team arrives. Delays caused by missing materials are the number one reason renovations overrun. Our planning guide covers this stage in much greater detail, including how to set a realistic budget and choose a reliable contractor.
If you want a clear picture of expected costs, our bathroom cost breakdown provides realistic UK figures. You can also use our bathroom renovation cost calculator to get a personalised estimate for your project.
Stage 2: Stripping and Demolition
Once planning is complete, the physical work begins with a full strip-out. This is the noisiest, dustiest and most disruptive stage, but it is mercifully brief. Most bathrooms can be stripped back to bare walls and floor in a single day.
Everything comes out. The old suite, tiles, shower enclosure, vanity units, towel rails, lighting, and often the existing plasterboard or render behind the tiles. Fitters will remove old pipework that is no longer needed and cap off any live services. The skip outside your house tends to fill faster than you expect.
There are a few things to be aware of. In properties built before the mid-1980s, textured coatings on ceilings, floor tiles, pipe lagging and even old cistern gaskets can contain asbestos. A professional fitting team will recognise suspect materials and advise on testing or licensed removal. This is not something to gamble on. If in doubt, a sample can be sent to an accredited laboratory for analysis before demolition continues.
The strip-out also reveals the true condition of the room. Rotten floor joists, blown plaster, damp patches and corroded pipework only become visible once the old bathroom has been removed. An experienced fitter expects to find at least one hidden issue in an older property. Factoring a contingency of around ten percent into your budget covers these discoveries without derailing the project. Our guide to avoiding costly renovation mistakes explains the most common problems and how to handle them.
Stage 3: First Fix Plumbing and Electrics
With the room stripped bare, the first fix trades move in. This stage establishes the hidden infrastructure that everything else depends on.
Plumbing first fix involves running hot and cold supply pipes to the positions where each fixture will sit, installing new waste runs and connecting them to the soil stack. If the layout is changing significantly, this is where the bulk of the plumbing work happens. Concealed shower valves need their supply pipes and mounting brackets set precisely at this point because they will be buried behind the finished wall. Thermostatic mixing valves are tested under pressure before anything is covered up.
Electrical work runs in parallel. Under Part P of the Building Regulations, most electrical work in a bathroom must be carried out by a qualified electrician. This includes repositioning light switches outside the room, installing extractor fans, fitting heated towel rail spurs and wiring in any downlights or shaver sockets. Cables are chased into walls and routed before plastering or boarding begins.
If underfloor heating is part of the project, the heating mat or cable system is laid at this stage too. Electric underfloor heating is by far the most common choice in bathroom renovations because it does not require changes to the central heating system and adds minimal height to the floor build-up. The heating element is embedded in flexible adhesive over the prepared subfloor, with the thermostat wiring run back to a suitable location outside the bathroom.
All first fix work must be tested, photographed and signed off before it disappears behind walls and floors. No responsible fitter skips this step.
Stage 4: Structural Work and Substrate Preparation
This is the stage that separates a bathroom that lasts from one that fails within a few years. Surface preparation is invisible in the finished room, but it determines whether tiles stay bonded, whether water finds its way into the structure, and whether floors remain level.
Floor levelling comes first. Timber floors may need strengthening with additional noggins or a layer of plywood to eliminate flex, because flexible floors crack tile grout and, eventually, tiles. Concrete floors are screeded level if needed. The goal is a flat, rigid surface across the entire floor area.
Wall preparation follows. In most professional renovations, old plaster is removed and replaced with cement-based tile backer boards. These boards, typically 12mm thick, provide a stable, moisture-resistant substrate that is vastly superior to plasterboard for tiling. Our article on why cement boards matter in bathrooms explains the technical reasons in detail. Backer boards are fixed to timber battens or directly to masonry, with joints taped and sealed.
Waterproofing is critical. In shower areas and wet rooms, a liquid tanking membrane is applied to every surface that will receive water. This includes the shower floor, walls to at least 1800mm above finished floor level, and any areas around baths where splashing is likely. Tanking creates a continuous waterproof barrier beneath the tiles. In a full wet room, the entire room is tanked, and a linear or point drain is set into a carefully formed gradient in the floor. Cutting corners at this stage is the single most expensive mistake in bathroom renovation, because water damage to the structure beneath is costly to repair and often invisible until significant harm has been done.
Stage 5: Tiling
With the substrate prepared and tanked, tiling begins. Professional tilers work walls first, then floors.
Wall tiling starts from a datum line, not from the floor. A horizontal laser line is set at a calculated height so that cut tiles at the bottom and top of each wall are balanced and symmetrical. Tiles are bedded in flexible adhesive that is matched to the substrate and tile type. Large-format porcelain tiles require different adhesives and techniques compared to small ceramic mosaics. Your choice of tile affects both the installation method and the time required, so it is worth reading about bathroom tile types before making a final decision.
Feature walls, niches and shelving recesses are tiled with particular care because they draw the eye. Mitre cuts at external corners give a clean, modern finish without the need for plastic trim strips. Cuts around pipework, valves and electrical points need to be precise and are typically made with diamond-tipped hole saws.
Once wall tiles are complete and the adhesive has cured (usually overnight), floor tiling begins. Adhesive is spread with a notched trowel and tiles are levelled using a clip-and-wedge system to eliminate lippage. Floor tiles must achieve full adhesive coverage to prevent hollow spots that can crack under load.
Grouting is the final step. Flexible, water-resistant grout is worked into every joint and cleaned off before it sets. Colour-matched grout can make a wall of tiles look almost seamless, while contrasting grout emphasises the pattern. Silicone sealant rather than grout is used in every internal corner and at every change of plane, because these joints need to absorb slight structural movement without cracking.
Stage 6: Second Fix and Installation
This is where the bathroom starts to look like a bathroom. With all surfaces tiled, the sanitaryware and fixtures are installed.
The bath or shower tray goes in first if it was not already set during the tiling stage. Baths are positioned on adjustable legs or a timber cradle, levelled carefully and connected to the waste. Shower trays are bedded on a mortar base or foam riser kit and connected to the drain. Enclosures and shower screens are fitted once the tray or bath is secured.
The toilet is installed next. Close-coupled, back-to-wall and wall-hung models each have different fixing and connection requirements. Wall-hung toilets connect to a concealed frame that was installed during first fix. The cistern is hidden inside the wall, with only the flush plate visible on the finished surface.
Basins and vanity units follow. Pedestal basins, wall-hung basins, countertop basins and built-in vanity units all require precise positioning to align with the pre-plumbed supply and waste connections. Taps are fitted, waste traps connected and everything tested for leaks under pressure.
Silicone sealing around every fixture is one of the last tasks in this stage. Professional bathroom fitters use sanitary-grade silicone in a colour matched to the grout or sanitaryware. A neat silicone line requires a practiced hand and proper masking. It is a small detail that makes an outsized difference to the finished appearance.
Stage 7: Finishing Touches
The final stage brings the room together. Accessories are fixed to the walls: toilet roll holders, towel hooks, robe hooks, shower shelves and soap dishes. These are typically screwed into the tile and backer board using appropriate fixings, not adhesive pads.
Mirrors and bathroom cabinets are hung. Electrically heated demister mirrors are wired into the lighting circuit. LED vanity lighting is connected and tested. The extractor fan is given its final commissioning to confirm the correct airflow rate, which must meet Building Regulations for rooms without openable windows.
Any exposed plasterwork above the tile line is painted with a moisture-resistant emulsion. Two coats minimum, with proper preparation. Skirting boards or shadow gaps are fitted if specified.
A final inspection covers every element. Taps are run, the shower is tested at full flow, the toilet is flushed multiple times, all drainage is checked for leaks, silicone joints are examined, grout lines are reviewed, and every accessory is tested for secure fixing. The room is cleaned thoroughly and any protective films are removed from chrome fittings and glass.
The Order Matters
Every stage described above depends on the one before it. You cannot tile before the substrate is prepared. You cannot install sanitaryware before the tiling is complete. You cannot grout before the adhesive has cured. Attempting to skip stages or reorder them to save time invariably leads to problems that cost more to fix than the time they were supposed to save.
This is precisely why hiring experienced professionals matters. A skilled bathroom renovation team manages the sequence, coordinates the trades and anticipates problems before they become expensive. If you are ready to discuss your project, get in touch with us for a free, no-obligation quote.
Frequently Asked Questions
How long does a full bathroom renovation take?
Do I need to move out during the renovation?
What is tanking and why is it necessary?
Can I change the position of my toilet during a renovation?
Should I buy my own materials or let the fitter supply them?
Do I need Building Regulations approval for a bathroom renovation?
How do I get a quote for my bathroom renovation?
Past Projects


Get a Free Quote
Book a free, no-obligation site survey. Call us on +44 7428 653 653 or request a callback.
Book Free SurveyOur Clients' Reviews

5/5

5/5

5/5

5/5
Based on 453+ verified reviews across all platforms
Related Articles
How Much Does a New Bathroom Cost in 2026? UK Pricing Guide
What a New Bathroom Really Costs in 2026 The question every homeowner asks before a bathroom renovation is the same. How much?
view this article Read more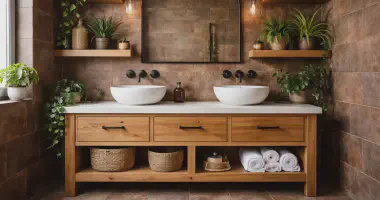
Complete Bathroom Overhaul: When to Strip Out and Start Fresh
When Does a Bathroom Need a Complete Overhaul? A fresh coat of paint and a new shower curtain can carry a tired bathroom only so far.
view this article Read more
What You Need to Know Before Starting a Bathroom Renovation
The Planning That Makes or Breaks a Bathroom Renovation The difference between a bathroom renovation that finishes on time and on budget, and one that drags on for weeks with spiralling costs, is almost never about the quality of the tradespeople.
view this article Read more
Bathroom Remodelling vs Renovation: Which Do You Need?
Two Words That Mean Very Different Things Homeowners searching for bathroom help online run into a persistent confusion. One company advertises bathroom renovation.
view this article Read more
How to Replace a Shower with a Bath
Replacing a shower with a bath is an excellent way to enhance both the functionality and comfort of your bathroom, especially if you’re accommodating a growing family.
view this article Read more
Bathroom Tiling Styles for Timeless Elegance
Why Layout Matters More Than the Tile Itself A bathroom tile is a raw ingredient. The layout pattern is the recipe.
view this article Read more
Quartz, Granite or Porcelain Worktops: Which Suits Your Kitchen?
The Three-Way Decision Most Kitchen Renovations Come Down To Once you have decided that laminate is not enough and solid wood is not right for your cooking habits, the conversation narrows quickly.
view this article Read more
Ceramic Disc Technology in Bathroom Taps: How It Works
The Technology Inside Almost Every Modern Tap If your bathroom taps turn with a smooth quarter-turn rather than two and a half rotations, they contain ceramic disc cartridges.
view this article Read more
Fitting Kitchen Worktops: The Complete Installation Guide
From Order to Fitted The worktop is one of the last things fitted in a kitchen renovation and one of the first things to go wrong if the process is rushed.
view this article Read more
How to Choose an Electrical Bathroom Mirror
What an Electrical Bathroom Mirror Actually Does An electrical bathroom mirror is a permanently wired fixture that combines a mirror with integrated LED lighting, and often a demister pad, Bluetooth speakers, a shaver socket, or adjustable colour temperature.
view this article Read more
Best Bathroom and Toilet Brands in the UK
What Makes a Good Bathroom Brand The brand name on your toilet, basin or shower valve determines far more than the price tag.
view this article Read more
Bathroom Underfloor Heating: Types, Installation and What to Expect
Why Underfloor Heating Works So Well in Bathrooms Stepping onto a warm bathroom floor on a cold January morning is one of those small luxuries that, once experienced, becomes very difficult to give up.
view this article Read more